


There are few experiences as universally captivating as watching the sun dip below the horizon, painting the sky in brilliant hues of orange, pink, and purple. Yet, translating that awe-inspiring scene into a breathtaking sunset photo is a challenge that frustrates many photographers. How often have you witnessed a vibrant, glowing sky, only to look at your camera screen and find a dull, underexposed, or washed-out image? The Amazing fact about sunset.
Capturing the fleeting beauty of a sunset requires more than just pointing your camera at the sun and pressing the shutter. It demands a blend of technical knowledge, precise timing, thoughtful composition, and careful post-processing. From understanding how fading light affects your sensor to balancing the intense contrast between a blazing sky and a shadowed foreground, landscape photography at dusk is a true test of your skills.
In this comprehensive guide, we will break down every element of sunset photography. Whether you are an enthusiastic beginner aiming to elevate your sunset pictures or a seasoned hobbyist looking to refine your technical workflow, this article will provide you with the actionable insights you need. We will cover planning, gear, settings, composition, advanced field techniques, and editing, ensuring that your next sunset photo is nothing short of spectacular.
1. The Art of Planning: Timing, Weather, and Location
The most stunning sunset pictures are rarely the result of a happy accident. They are the product of meticulous planning. The light changes rapidly during the transition from day to night, and being in the right place at the right time is half the battle.
Understanding the Phases of Evening Light
To capture a mesmerizing sunset photo, you must understand how light behaves as the sun descends. The evening transition is generally divided into several phases:
- Golden Hour: This is the period shortly before sunset when the sun is low on the horizon. The light travels through more of the Earth’s atmosphere, scattering blue wavelengths and bathing the landscape in warm, golden, and red tones. The light is soft, directional, and casts long, dramatic shadows.
- Sunset: The exact moment the trailing edge of the sun disappears below the horizon.
- Blue Hour: The period immediately after sunset. The warm colors in the sky begin to fade into deep, rich blues and purples. This is a fantastic time for long exposures, as the ambient light drops significantly.
Knowing the best time for golden hour shots is crucial. Depending on your geographical location and the season, the “golden hour” might last exactly an hour, or it could be as short as twenty minutes. Arrive at your location at least an hour before the scheduled sunset to scout your composition and set up your gear while the light is still manageable.
Analyzing Weather and Cloud Cover
A clear, cloudless sky often results in a boring sunset photo. Clouds are the canvas upon which sunset colors are painted. However, not all clouds are created equal:
- High-level clouds (Cirrus): These wispy clouds catch the light long after the sun has set, creating spectacular streaks of pink and magenta.
- Mid-level clouds (Altocumulus): These puffy clouds can light up dramatically, offering incredible texture and depth.
- Low-level clouds (Stratus): Thick, low clouds on the horizon can block the sun entirely, ruining the sunset. However, if there is a gap between the horizon and the cloud deck, the sun can shine through at the last moment, creating an intense, fiery glow.
Today, photographers have access to incredible technology for forecasting light. Predicting vivid sky colors with apps like PhotoPills, Alpenglow, or Clear Outside has become an essential part of the workflow. These applications analyze cloud height, humidity, and atmospheric pressure to give you a probability score for a colorful sunset.
Scouting Your Location
A beautiful sky is only part of the equation. A truly great sunset photo requires a compelling foreground to anchor the image and give it a sense of scale and place. When scouting locations, look for:
- Reflective surfaces (lakes, rivers, wet beach sand).
- Leading lines (fences, roads, shoreline curves).
- Interesting silhouettes (trees, rock formations, architecture).
2. Choosing the Right Gear for Sunset Photography
While the photographer’s vision is the most important factor, having the right equipment allows you to execute that vision without technical limitations. As the light fades, the demands on your gear increase.
Smartphone vs DSLR for Evening Sky
One of the most common debates in modern photography is the capability of a smartphone vs DSLR for evening sky captures.
Smartphones: Modern smartphones utilize computational photography—rapidly capturing multiple exposures and blending them instantly—to handle the extreme dynamic range of a sunset. This makes them incredibly convenient for spontaneous shooting. However, smartphones have tiny sensors. As the sun dips and the light fades, they struggle to gather enough photons, leading to aggressive digital noise reduction that smears fine details.
DSLRs and Mirrorless Cameras: Interchangeable lens cameras possess much larger sensors, offering superior light-gathering capabilities, greater dynamic range, and the ability to capture uncompressed RAW files. A dedicated camera allows for precise manual control over exposure, depth of field, and focal length. If you want to print your sunset pictures or perform detailed edits, a DSLR or mirrorless camera is the indisputable choice.
Selecting the Perfect Lens
When packing your bag, you might wonder what the best lens for landscape photography is during a sunset. The answer depends entirely on your composition:
- Wide-Angle Lenses (14mm – 35mm): The traditional choice for landscapes. A wide-angle lens allows you to capture expansive skies, sweeping cloud formations, and sweeping foregrounds. They are ideal when the sky is dramatic and you have a strong, close-up foreground element to anchor the shot.
- Standard Lenses (35mm – 70mm): These provide a natural field of view, closely mimicking human sight. They are great for tighter landscape compositions where a wide-angle might push distant mountains too far into the background.
- Telephoto Lenses (70mm – 200mm+): Often overlooked for landscapes, telephoto lenses are phenomenal for sunsets. They compress the scene, making the sun appear massive against your subjects. A telephoto lens allows you to isolate specific elements, like a solitary tree back-lit by the setting sun, or the layered ridges of distant mountains catching the last rays of light.
Essential Filters and Stabilization
As the sun gets closer to the horizon, the contrast between the brilliant sky and the darkening land becomes extreme.
Neutral Density Filters: Using a neutral density filter for bright skies is a traditional landscape technique. Specifically, a Graduated Neutral Density (GND) filter is half dark and half clear. By placing the dark half over the bright sky, you balance the exposure, allowing your camera to capture detail in both the sky and the dark foreground in a single frame. While digital blending has made GNDs less mandatory, they remain invaluable for getting the exposure right in-camera. Standard Neutral Density (ND) filters are also crucial if you wish to blur water or clouds while the sun is still up.
Tripods: Because sunset photography often pushes into the blue hour, your shutter speeds will inevitably drop. A sturdy tripod is non-negotiable. It stabilizes your camera, allowing you to use low ISOs and small apertures without worrying about blurry images.
3. Mastering Camera Settings at Dusk
The transition from late afternoon to dusk means your camera settings cannot remain static. Auto mode will almost always fail you during a sunset; it will try to brighten the scene to “daylight” levels, blowing out the vibrant sunset colors and turning silhouettes into muddy, noisy gray shapes.
Taking Control: Manual Mode
To capture the scene exactly as you envision it, using manual mode for dramatic lighting is highly recommended. Manual mode gives you independent control over your ISO, Aperture, and Shutter Speed (the Exposure Triangle), allowing you to dictate how light or dark the final image will be.
Golden Hour Camera Settings
When shooting during the golden hour, the light is still relatively strong, but it is highly directional. Here is a baseline for your golden hour camera settings:
- ISO: Keep this as low as possible, ideally at your camera’s base ISO (usually ISO 100). A low ISO ensures maximum dynamic range and the cleanest possible image.
- Aperture: For landscape photography, you generally want a wide depth of field so everything from the foreground to the horizon is sharp. An aperture between f/8 and f/11 is usually the “sweet spot” for most lenses, providing edge-to-edge sharpness.
- Shutter Speed: Adjust your shutter speed until your camera’s light meter indicates a balanced exposure. If you want to deliberately underexpose to saturate the colors in the sky, increase your shutter speed slightly.
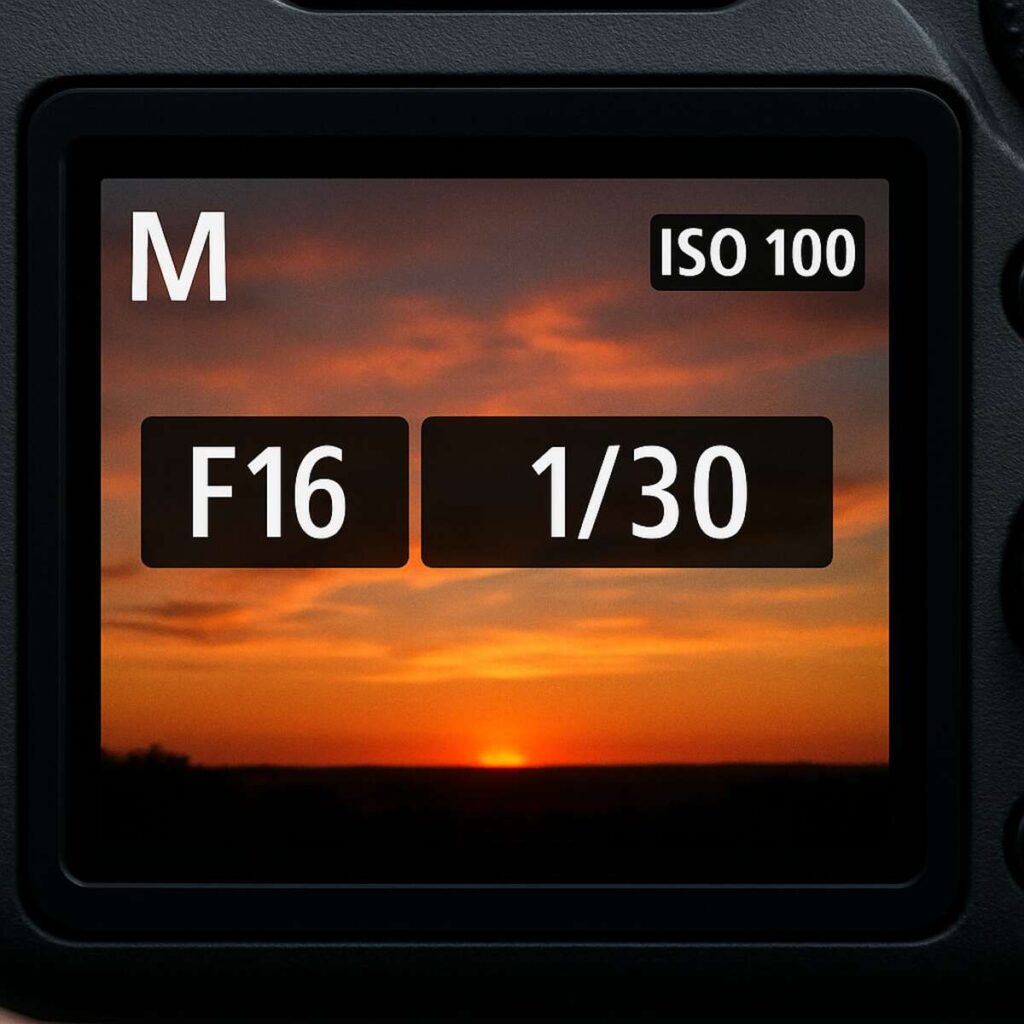
Creating the Sunstar Effect
One of the most striking elements you can include in a sunset photo is a sunburst or sunstar. This occurs when a bright point of light (the sun) is forced through a very small opening (your lens aperture).
To achieve this, you need specific sunstar effect aperture settings. Stop your lens down to a narrow aperture, typically between f/16 and f/22. The blades of your lens’s aperture will create distinct spikes of light radiating from the sun. Pro-tip: The sunstar effect is most pronounced when the sun is partially obscured by a hard edge, such as the horizon, a mountain peak, or the branches of a tree.
Note: Shooting at f/22 can introduce lens diffraction, which slightly softens the overall sharpness of the image. It is a creative trade-off for getting those beautiful rays of light.
Managing Fading Light and Noise
As the sun sets and the blue hour begins, the ambient light drops rapidly. If you are shooting handheld, you will be forced to raise your ISO to maintain a fast enough shutter speed to prevent blur. High ISOs introduce digital noise (grain) and reduce dynamic range.
If you are using a tripod, you can leave your ISO at 100 and simply let the shutter speed drop to several seconds. However, if you must shoot handheld, reducing noise in low light shots requires a strategic approach.
- Open your aperture slightly (e.g., from f/11 to f/5.6 or f/4) to let in more light.
- Use a camera or lens with Image Stabilization (IBIS or OIS) to shoot at slower handheld shutter speeds.
- Utilize modern AI noise reduction software in post-processing, which works miracles on high-ISO RAW files.
Preventing Camera Shake
When your shutter speeds drop below 1/60th of a second, any movement of the camera will result in a blurry photo. Preventing camera shake during long exposures is critical for sharp landscapes.
- Use a Tripod: Ensure all leg locks are tight and the center column is down for maximum stability.
- Turn Off Image Stabilization: If your camera is on a tripod, internal stabilization mechanisms can actually create micro-vibrations as they search for movement. Turn them off.
- Use a Remote Release or Timer: Pressing the shutter button physically shakes the camera. Use a wireless remote, a cable release, or a 2-second delay timer to ensure your hands are off the camera when the exposure begins.
4. Advanced Composition for Dramatic Skies
Technical perfection means nothing if the composition of your sunset photo is flat and uninspired. A great landscape photo guides the viewer’s eye through the frame, telling a story about the environment.
The Rule of Thirds in Landscape Horizons
The rule of thirds in sky compositions is a foundational guideline that instantly improves the balance of your images. Imagine your viewfinder is divided by two equally spaced horizontal lines and two equally spaced vertical lines, creating a grid of nine squares.
Where you place your horizon line completely changes the narrative of the photo:
- If the sky is spectacular: Place the horizon on the bottom third line. This dedicates two-thirds of the frame to the brilliant sunset colors, striking cloud formations, and dramatic light rays.
- If the foreground is spectacular: If you have fascinating leading lines, reflective tide pools, or blooming wildflowers, but the sky is relatively clear, place the horizon on the top third line. This dedicates the majority of the frame to the landscape, using the sunset merely as a colorful accent at the top.
- Avoid the middle: Placing the horizon dead center cuts the image in half, leaving the viewer confused about whether the subject is the sky or the land. (The only exception to this is when shooting perfect reflections in still water, where symmetry is the goal).
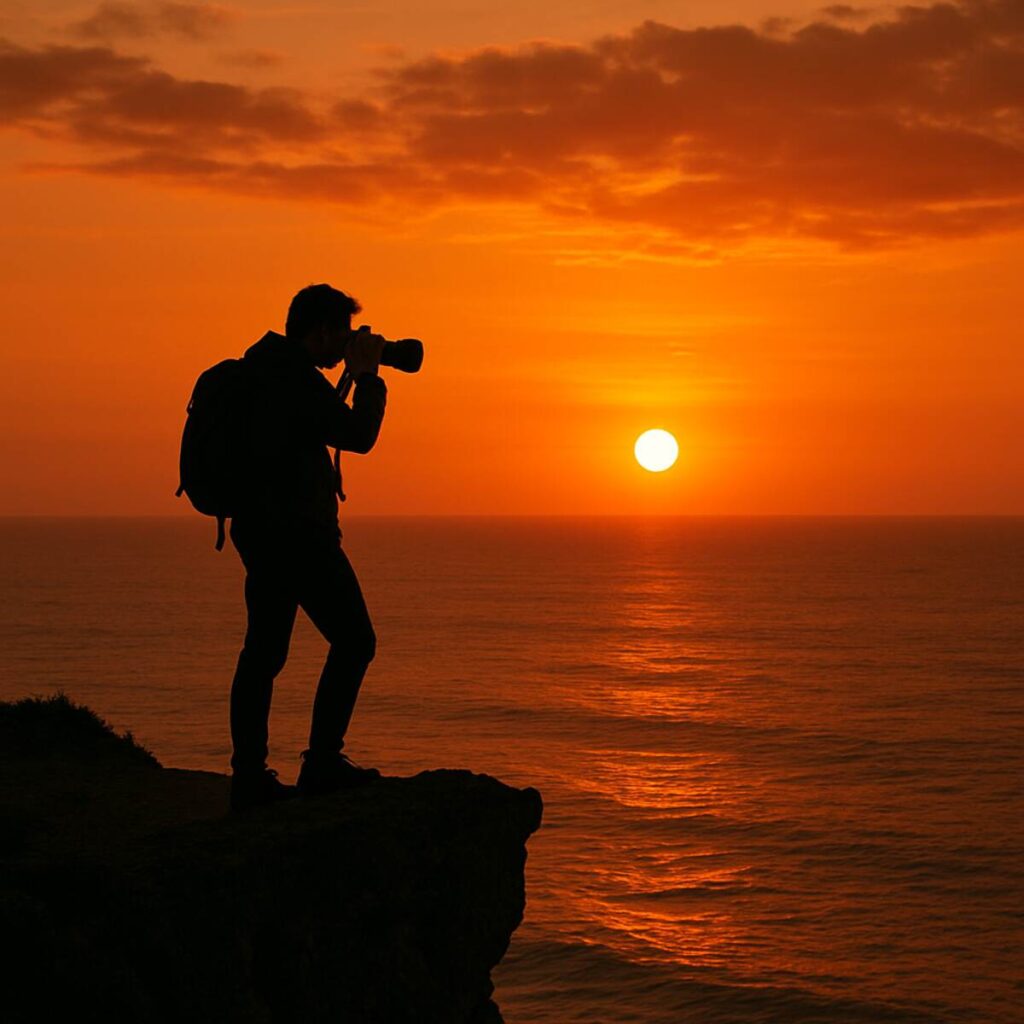
How to Capture Beach Silhouettes
Silhouettes add a sense of mystery, scale, and emotion to a sunset photo. Beaches are fantastic locations for this, as the open horizon provides a clean, bright background.
Learning how to capture beach silhouettes is a fun and relatively simple technique once you understand the exposure mechanics:
- Find a distinct subject: A person walking a dog, a lifeguard tower, a twisted piece of driftwood, or a palm tree. The subject must have a recognizable outline, as all interior details will be lost to shadow.
- Expose for the sky: Point your camera at the brightest part of the sunset sky (but not directly at the sun) and set your exposure. Because the sky is so much brighter than the subject, exposing for the sky will naturally render the subject completely black.
- Positioning: Ensure your subject is placed directly against the bright sky, not overlapping with dark foreground elements like a mountain or dark water, which would cause them to blend in and lose their distinct shape.
- Freeze the action: If your subject is moving (like people jumping or birds flying), ensure your shutter speed is fast enough (at least 1/250s) to freeze their motion cleanly.
Utilizing Foreground Interest
A common mistake beginners make is pointing their camera upwards, filling the frame entirely with the sky. While the colors are beautiful, the resulting image lacks depth; it feels two-dimensional.
To create a compelling sunset photo, you must incorporate foreground interest. This provides a visual anchor that invites the viewer to step into the scene. Look for rocks, flowers, pathways, or ice formations. Get low to the ground with a wide-angle lens to exaggerate the size of these foreground elements, creating a strong sense of three-dimensional depth that leads the eye toward the glowing horizon.
5. Advanced Field Techniques: HDR and Long Exposures
As you become more comfortable with your camera, you can begin to introduce advanced techniques that solve the inherent challenges of sunset photography and open up new avenues for creativity.
Overcoming High Contrast with Exposure Bracketing
The greatest challenge during a sunset is the extreme contrast between the blazing sun and the shadowed landscape. Camera sensors do not possess the dynamic range of the human eye. If you expose for the sky, the land turns black. If you expose for the land, the sky blows out to pure, unrecoverable white.
Managing high dynamic range in landscapes often requires a technique called Exposure Bracketing (or HDR – High Dynamic Range photography). Instead of taking one photo, you program your camera to take a rapid sequence of photos at varying exposure levels.
A typical bracketed sequence includes:
- A base exposure (metered for the mid-tones).
- An underexposed frame (capturing the rich sunset colors and details in the bright sky).
- An overexposed frame (capturing details in the dark shadows of the foreground).
Later, during post-processing, these three (or five, or seven) images are merged into a single file that contains detail in both the brightest highlights and the deepest shadows, closely replicating what your eyes actually saw on location.
Mastering Water Reflections with Long Exposures
Water and sunsets are a match made in photographic heaven. However, choppy water can distract from the serene beauty of the sky.
Using long exposure techniques for water reflections is a transformative skill. By leaving the shutter open for anywhere from 5 to 30 seconds (or even minutes), moving water blurs into a smooth, glassy, mist-like surface. This ethereal effect simplifies the foreground and reflects the vivid colors of the sky perfectly.
To achieve this:
- You will need a sturdy tripod to keep the camera perfectly still.
- If the sun is still up, you will need a strong Neutral Density (ND) filter (like a 6-stop or 10-stop ND) to block light from entering the lens, allowing you to use a long shutter speed without completely overexposing the image.
- Compose your shot, lock focus, and then screw on the ND filter.
- Calculate the new exposure time based on the strength of your filter, and use a remote shutter release to take the photo.
Long exposures don’t just affect water. They also capture the movement of clouds, creating dynamic, streaking lines in the sky that point toward the setting sun, adding a powerful sense of motion and passing time to your sunset pictures.
6. Elevating Your Art: Post-Processing in Lightroom
Taking the photo is only the first half of the creative process. The digital darkroom is where your sunset photo truly comes to life. Shooting in RAW format is essential here, as RAW files retain all the color and exposure data captured by the sensor, giving you maximum flexibility during editing.
Developing Sunset Colors Naturally
It is incredibly easy to ruin a sunset photo by pushing the saturation sliders too far, resulting in neon, toxic-looking skies that look entirely fake. The goal of post-processing should be to enhance the natural beauty of the scene.
When editing vibrant colors in Lightroom, start with your White Balance.
- Temperature: Sunsets are naturally warm. If your camera’s Auto White Balance neutralized the warm tones, push the Temperature slider slightly toward yellow/orange to bring back that golden hour feel.
- Tint: Sunset skies often feature beautiful magenta hues. Adjusting the Tint slider slightly toward magenta can make those pink and purple tones pop.
Instead of cranking up global Saturation (which affects every color equally and can make skin tones or greens look unnatural), use the Vibrance slider. Vibrance is a “smart” saturation tool that primarily boosts muted colors while leaving already-saturated colors alone, protecting your image from becoming garish.
Targeted Adjustments with the HSL Panel
To truly finesse your sunset colors, dive into the HSL (Hue, Saturation, Luminance) panel in Lightroom. This panel gives you surgical control over individual colors.
- Hue: You can shift the yellows slightly toward orange, or the oranges slightly toward red, to create a more intense sunset gradient.
- Saturation: You can boost the saturation of just the blues in the sky, or just the oranges near the sun, without affecting the rest of the image.
- Luminance: This is the secret weapon for sunset pictures. By lowering the luminance (brightness) of the blues and oranges, you actually deepen the colors, making the sky look richer, more dramatic, and infinitely more professional than simply boosting saturation.
Managing Light with Masking
Modern editing software features incredibly powerful AI masking tools. One of the best ways to process a sunset photo is to edit the sky and the foreground independently.
- Create a Select Sky mask. You can lower the highlights, slightly drop the exposure to bring out cloud details, and add a touch of warmth and clarity only to the sky.
- Create a Select Subject or Linear Gradient mask for the foreground. Here, you can gently lift the shadows to reveal hidden details, add a bit of contrast, and apply a slightly cooler white balance to mimic the shadows cast during dusk.
By editing these zones separately, you balance the exposure and color temperature of the entire image, ensuring that neither the sky nor the land overpowers the other.
Conclusion: Chasing the Light
Capturing the perfect sunset photo is a deeply rewarding pursuit that blends artistic vision with technical precision. It requires you to be observant of the weather, prepared with the right equipment, and knowledgeable enough to override your camera’s automatic instincts when the light becomes challenging.
By understanding the importance of planning and predicting vivid skies, you ensure you are in the right place at the right time. By choosing the best lenses and filters, and diligently preventing camera shake, you guarantee technical sharpness. By mastering manual mode, exposure bracketing, and long exposures, you take total control over the fading light. And finally, by thoughtfully composing your shots and delicately editing those vibrant colors in Lightroom, you transform a fleeting moment in time into a lasting piece of art.
The most important tip of all, however, is to simply get out there and practice. The light at dusk is unpredictable, and every sunset is entirely unique. Sometimes the sky will fizzle out into a dull gray, and other times it will explode into a fiery canvas that takes your breath away. Embrace the process, learn from your failed exposures, and continue chasing the light. Your best sunset pictures are still ahead of you.